Environments
An Environment defines specific implementation details on how HobbyFarm connects to a provider, such as DigitalOcean or AWS, for scheduling virtual machines. An environment defines configuration information such as provider credentials, virtual machine templates to use, and the total capacity of virtual machines which can be deployed.
To access the Environments page, log into the HobbyFarm Admin-UI and click the Configuration option in the top navigation menu. In the left navigation menu, click the Environments option.
NOTE: At least one VM Template must be created before creating an
Environment.
NOTE: An environment must be configured with a provisioner before a virtual machine can be created by HobbyFarm.
Creating an Environment
To create a new Environment, click on the +NEW button in the top left corner of the page under the Environments heading. A popup will appear with a form to fill out the details of the new Environment. The following information will explain each field in the form.
Basic Information
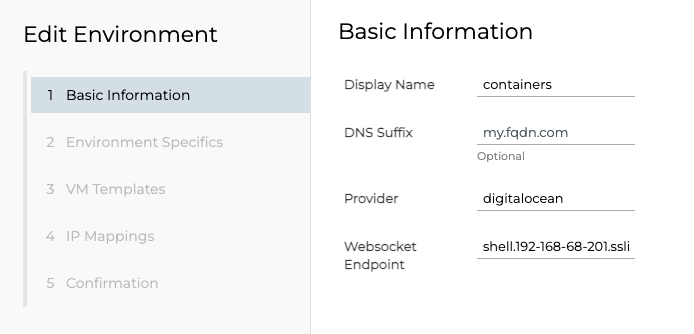
The Basic Information section of the form is used to provide basic information about the Environment.

Variables
| Setting | Default | Optional | Description |
|---|---|---|---|
| Display Name | none | No | The name of the Environment. This name will be used to identify the environment in the HobbyFarm Admin-UI and API. |
| DNS Suffix | none | Yes | **DEPRECATED** This feature will be removed in a future release. |
| Provider | none | No | The provider to use for the environment, ie. digitalocean, aws, etc. |
| Websocket Endpoint | none | No | This should be the URL for the shell domain, ie. shell.{domain}.com. |
Environment Specifics
The Environment Specifics section of the form is used to add specific values for the environment in HobbyFarm.
Entries in this section are utilized by virtual machine provisioners, such as DigitalOcean or AWS, for purposes such as the Secret containing the token used for authentication to the cloud provider. Other examples are VPCs, regions, security group IDs, etc. These values directly correlate to the provisioner in use for the environment. As such, each provisioner may have specific values that are required.

VM Templates
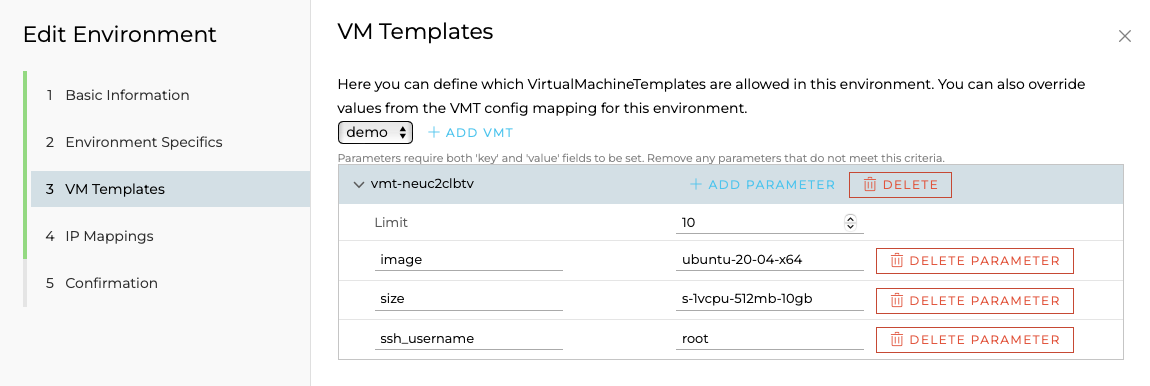
The VM Templates section of the form is used to select the available VM Templates to use for the environment via a dropdown menu. Multiple VM Templates can be selected for an environment. The selected VM Templates will be available for use when creating a virtual machine in the environment.
Here, a limit can be set for the number of virtual machines which can be deployed in the environment. This limit is used to prevent users from deploying more virtual machines than the environment can support.
Optional parameters can be set for each VM Template selected. These parameters are used to override the default values set in the VM Template. For instance, a VM Template may have a default size of s-1vcpu-1gb but the environment may require a larger size, such as s-2vcpu-4gb. In this case, the Size parameter can be set to s-2vcpu-4gb to override the default size.

Values
| Setting | Default | Optional | Description |
|---|---|---|---|
| Limit | 0 | No | The maximum number of virtual machines which can be deployed in the environment. |
IP Mappings
The IP Mappings section of the form is used in situations where Carrier Grade NAT (CGNAT) may be in use. This allows a 1:1 mapping of public IP addresses to private IP addresses.

NOTE: This feature may be deprecated in a future release.
Confirmation
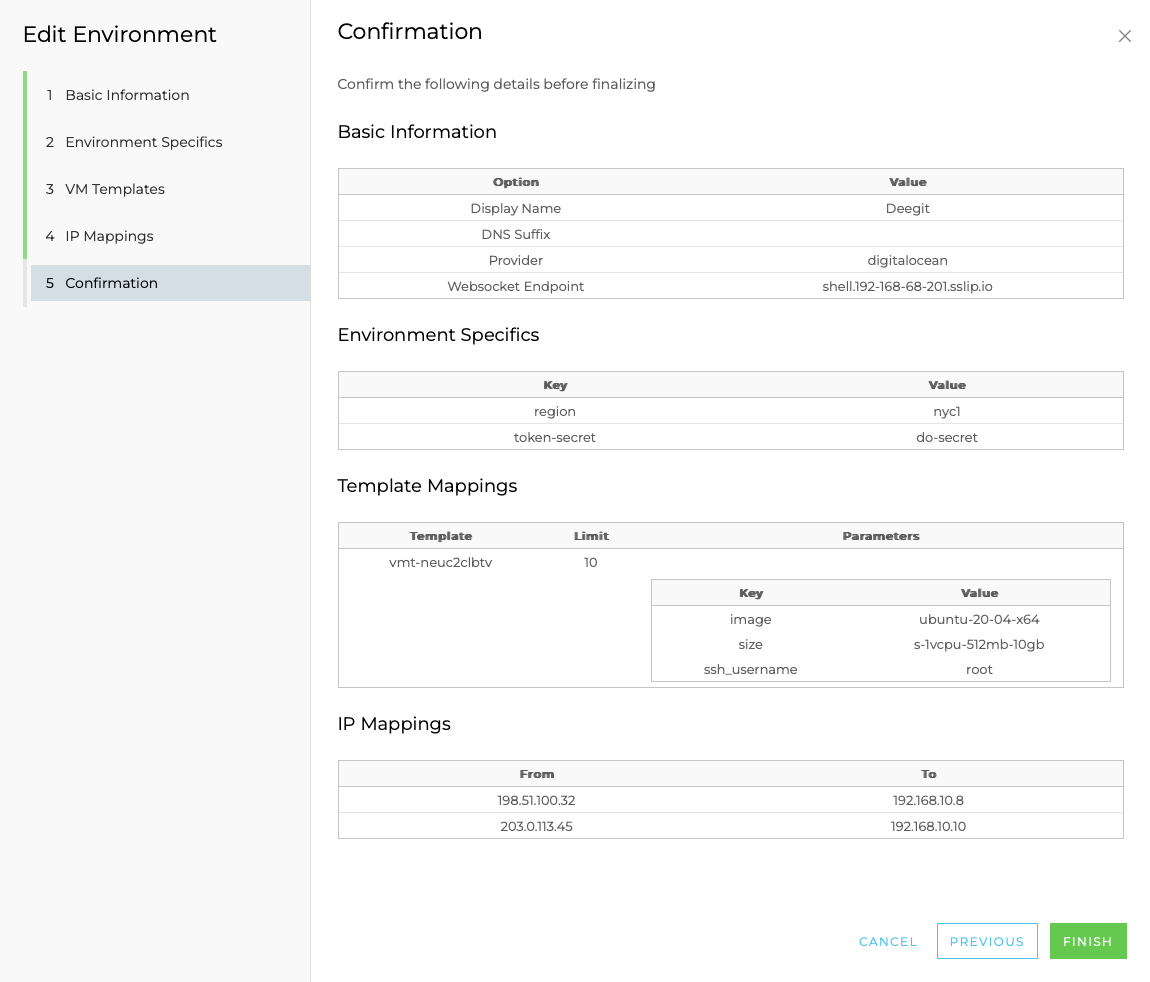
Finally, the Confirmation section of the form is used to confirm the details of the Environment before it is created. Once the details have been verified, click the FINISH button in the lower right corner to create the Environment.

Next Steps
Once an Environment has been created, a Provisioner must be configured before a virtual machine can be created by HobbyFarm. Please visit the Provisioners page for more information on deploying and using a provisioner.